Allocate IP prefixes
IP prefix pools (CoreIPPrefixPool) allocate IP subnets from larger prefixes.
Prerequisites
- A running Infrahub instance
Schema used in this guide
The examples on this page use the following schema nodes. Adapt the type names to match your own schema.
generics:
  - name: Service
    namespace: Infra
    human_friendly_id: ["name__value"]
    attributes:
      - name: name
        kind: Text

nodes:
  - name: IPPrefix
    namespace: Ipam
    inherit_from:
      - "BuiltinIPPrefix"

  - name: Service
    namespace: Customer
    inherit_from:
      - InfraService
    relationships:
      - name: assigned_prefix
        peer: IpamIPPrefix
        kind: Attribute
        cardinality: one
Step 1: Create a source prefix
Create the parent prefix:
- Web interface
- GraphQL
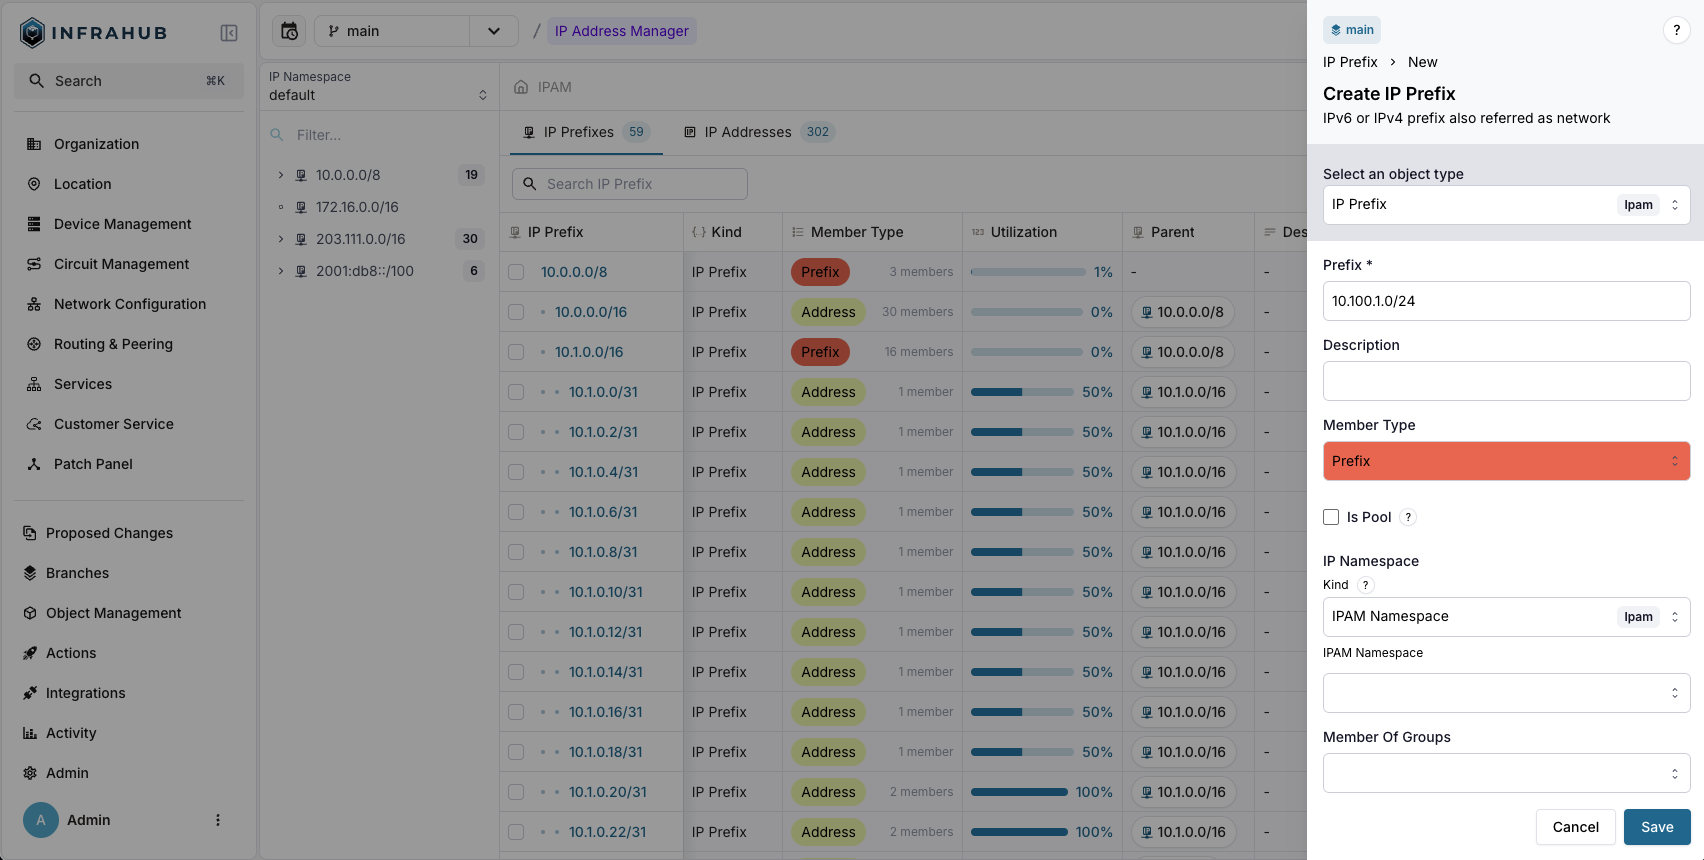
Navigate to IPAM → IP Prefixes and create a new prefix with:
- Prefix:
10.100.1.0/24 - Member Type:
prefix
mutation {
  IpamIPPrefixCreate(
    data: {prefix: {value: "10.100.1.0/24"}
    member_type: {value: "prefix"}}
  ) {
    ok
    object {
      id
    }
  }
}
Save the prefix ID for the next step!
Step 2: Create the IP prefix pool
Create a CoreIPPrefixPool Resource Manager:
- Web interface
- GraphQL
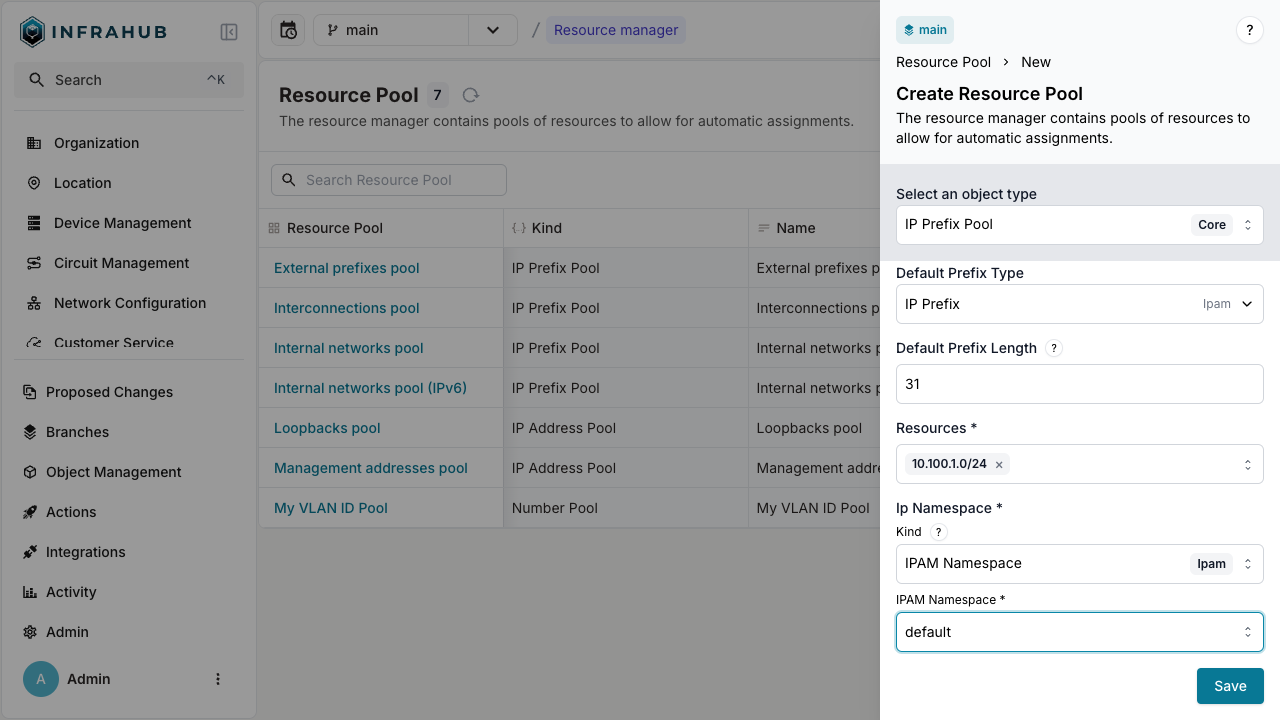
Navigate to Object Management → Resource Manager and create a new IP Prefix Pool with:
- Name:
Customer Service Pool - Default Prefix Type:
IpamIPPrefix - Default Prefix Length:
31 - Resources: Select the
10.100.1.0/24prefix - IP Namespace:
default
mutation {
  CoreIPPrefixPoolCreate(data: {
    name: {value: "Customer Service Pool"},
    default_prefix_length: {value: 31},
    default_prefix_type: {value: "IpamIPPrefix"},
    resources: [{id: "<prefix-id>"}],
    ip_namespace: {id: "default"}
  })
  {
    ok
    object {
      id
      hfid
    }
  }
}
Save the pool ID for allocation operations!
Step 3: Allocate IP prefixes
You can allocate IP prefixes in two ways: direct allocation or allocation during node creation.
Direct allocation
Allocate an IP prefix directly from the pool:
- Web interface
- GraphQL
Create an IP prefix. Next to the Prefix field, click the pool button, labeled "select a pool", and choose Customer Service Pool, then save. Infrahub allocates the next available subnet from the pool and creates the IP prefix with it.
Infrahub allocates a new prefix on each save. To get the same prefix back when a script or a Generator runs again, use the GraphQL method with an identifier.
mutation {
  InfrahubIPPrefixPoolGetResource(data: {
    hfid: ["Customer Service Pool"]
    data: {
      description: "prefix allocated to point to point connection"
    }
  })
  {
    ok
    node {
      id
      display_label
    }
  }
}
You have created an IP prefix record from the pool!
Allocation during node creation
Allocate an IP prefix when creating a customer service:
- Web interface
- GraphQL
Navigate to Customer Service → Add Customer Service.
Next to the Assigned Prefix field, click the pool button, labeled "select a pool", and choose your resource pool.
mutation {
  CustomerServiceCreate(
    data: {
      name: {value: "svc-123"}
      assigned_prefix: {from_pool: {id: "<POOL-ID>"}}
    }
  ) {
    ok
    object {
      display_label
      assigned_prefix {
        node {
          prefix {
            value
          }
        }
      }
    }
  }
}
An identifier in from_pool names the allocation, and Infrahub returns the same prefix to a later allocation from the same pool with the same identifier. Build it from the object it is allocated to, here the service svc-123 and its assigned_prefix relationship:
mutation {
  CustomerServiceCreate(
    data: {
      name: {value: "svc-123"}
      assigned_prefix: {from_pool: {id: "<POOL-ID>", identifier: "svc-123-assigned-prefix"}}
    }
  ) {
    ok
    object {
      display_label
      assigned_prefix {
        node {
          prefix {
            value
          }
        }
      }
    }
  }
}
This is essential for Generators and automated workflows. Without an identifier, Infrahub builds a default one from the object's kind, its human-friendly ID (HFID) and the relationship name, because CustomerService has an HFID. On another branch that cannot read the allocated prefix yet, a request with the same identifier gets a different prefix. See Idempotent allocation for the rules.
The customer service is created with an IP prefix allocated from the pool!
Next
- Allocate IP addresses
- Allocate numbers
- Weighted allocation to control which source prefixes are preferred